Click here for an Overview of Prerequisites
You must SHARE your RangerMSP (CommitCRM) folder. You will need to grant both FILE and SHARE permissions to whichever account you run the data ingestion from.
Install Apache HOP:
Download the Advantage JDBC driver, then copy the JDBC Advantage adsjdbc.jar file from C:\Program Files (x86)\Advantage 11.10\JDBC into in the /lib folder of your HOP installation.
Launch HOP
Tools → Options
Select the Projects tab
Select the field "GUI: The standard project folder proposed when creating projects"
Choose a top level folder for your projects - recommend this NOT be in the folder where you installed HOP - This makes it less hassle when you upgrade to a newer version of HOP in the future
Also I recommend a folder that is backed up (or even better yet, you can version control your HOP projects with the built-in GIT integration!)

Clone the GITHUB repository:
Launch your GIT shell
Navigate to the folder you designated for your PROJECTS folder.
git clone https://github.com/pdrangeid/RangerMSP-neo4j-ingestion
This will create a folder in hop-projects named 'RangerMSP-neo4j-ingestion
There are 3 configuration files needed for this project I have provided samples that you will need to mofify for your environment:
• Environment Configuration
• (2) Datasource configs (1 for the Neo4j database, 1 for your RangerMSP Advantage SQL Database)
I store my environment configurations in their own folder structure SEPARATE from my projects (this segments configurations from the actual pipeline/workflow code to allow for easier upgrades in the future) .
ie: /documents/hop-environments/rangermsp-neo4j/
Here are sample metadata config files:
Neo4j - Save this within the /metadata/neo4j-connection folder
or
and
Save this within the /metadata/rdbms folder
Launch HOP
Under Projects →
Click the p+ icon to ADD a project
Give it a name: RangerMSP-neo4j
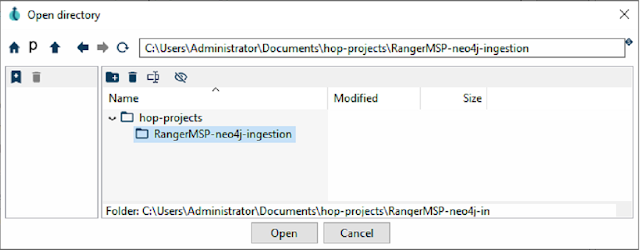
for HOME folder browse to the GIT repository you previously cloned:

After OPENING the project - Allow HOP to Add a default run configuration
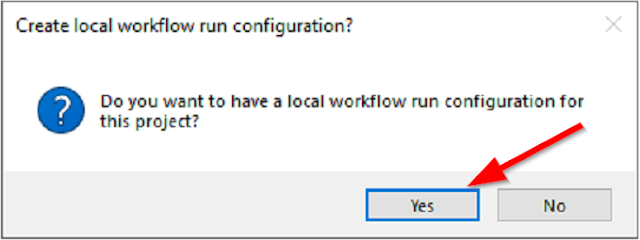
Also allow it to create a local workflow run configuration
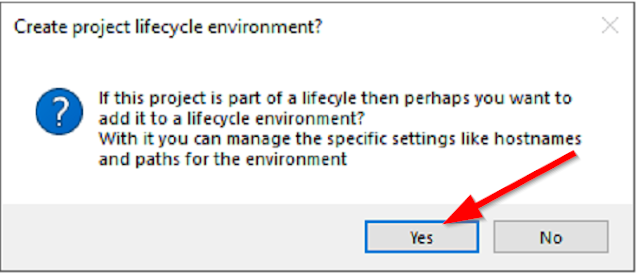
Also allow it to Create a lifecycle environment. You will need to provide some parameters (explained below)
Provide a name and purpose for the environment
Click Select, then choose the environment config file you downloaded previously

Adjust Configuration Parameters. Click "Edit". Make adjustments to any of the import parameters for your environment.
This is particularly important if you are using the free cloud hosted version of the neo4j AuraDB, as it is limited to 200k nodes, and 400k relationships.
Next you will need to modify the datasource properties for both Neo4j and RangerMSP:
On the left side of HOP click the "Metadata" explorer.
Select auradb-hopdev1 by doubleclicking (this example configuration is for Neo4j Cloud hosted auradb)
Edit the server hostname, and change the user/password with credentials you were provided when signing up for your Neo4j AuraDB cloud instance.
Click TEST and ensure you can connect to the neo4j database.
Now do the same for your RangerMSP Advantage SQL connection.
Again from the "Metadata" explorer selectRangerMSP by double-clicking.
In my sample it is assuming the rangerMSP database is running on the localhost (127.0.0.1) but you can change this to your server's IP.
Also change the sharename if it is different from what I've used (RangerMSP$)

Click Test to verify connectivity.
Now it's time to ingest Ranger data!
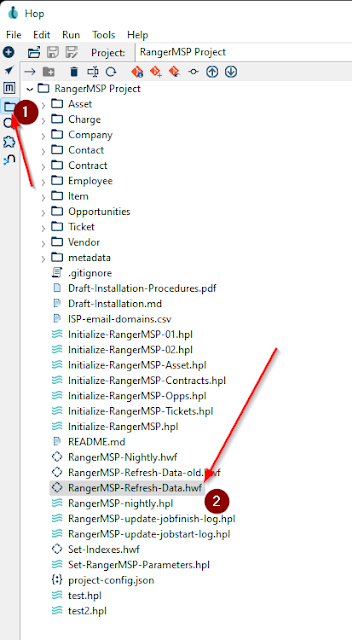
From File Explorer open the HOP Workflow "RangerMSP-Refresh-Data.hwf"
Now RUN the workflow to import data. Any errors will be shown below:
Ok - this is where I need some help & feedback. I've used these software packages, and tried to document the process step-by-step, but there are enough moving pieces that I'm sure there are some gotchas somewhere in the process.
What are some errors you encountered?
Missing instructions, or common errors you ran into?


No comments:
Post a Comment
Have a comment? Would love to hear it!